Showing posts with label China Glaze. Show all posts

Monday, September 10, 2012

Girly Bits Shift Happens

After wearing China Glaze's Stone Cold, a matte silver-infused charcoal polish, for a couple of days, I added Girly Bits Shift Happens, a multi-chromatic top coat.  I figured it's not often that I wear black nail polish, and with the base already done, a manicure with Shift Happens could not be easier.  I reviewed China Glaze Stone Cold here.

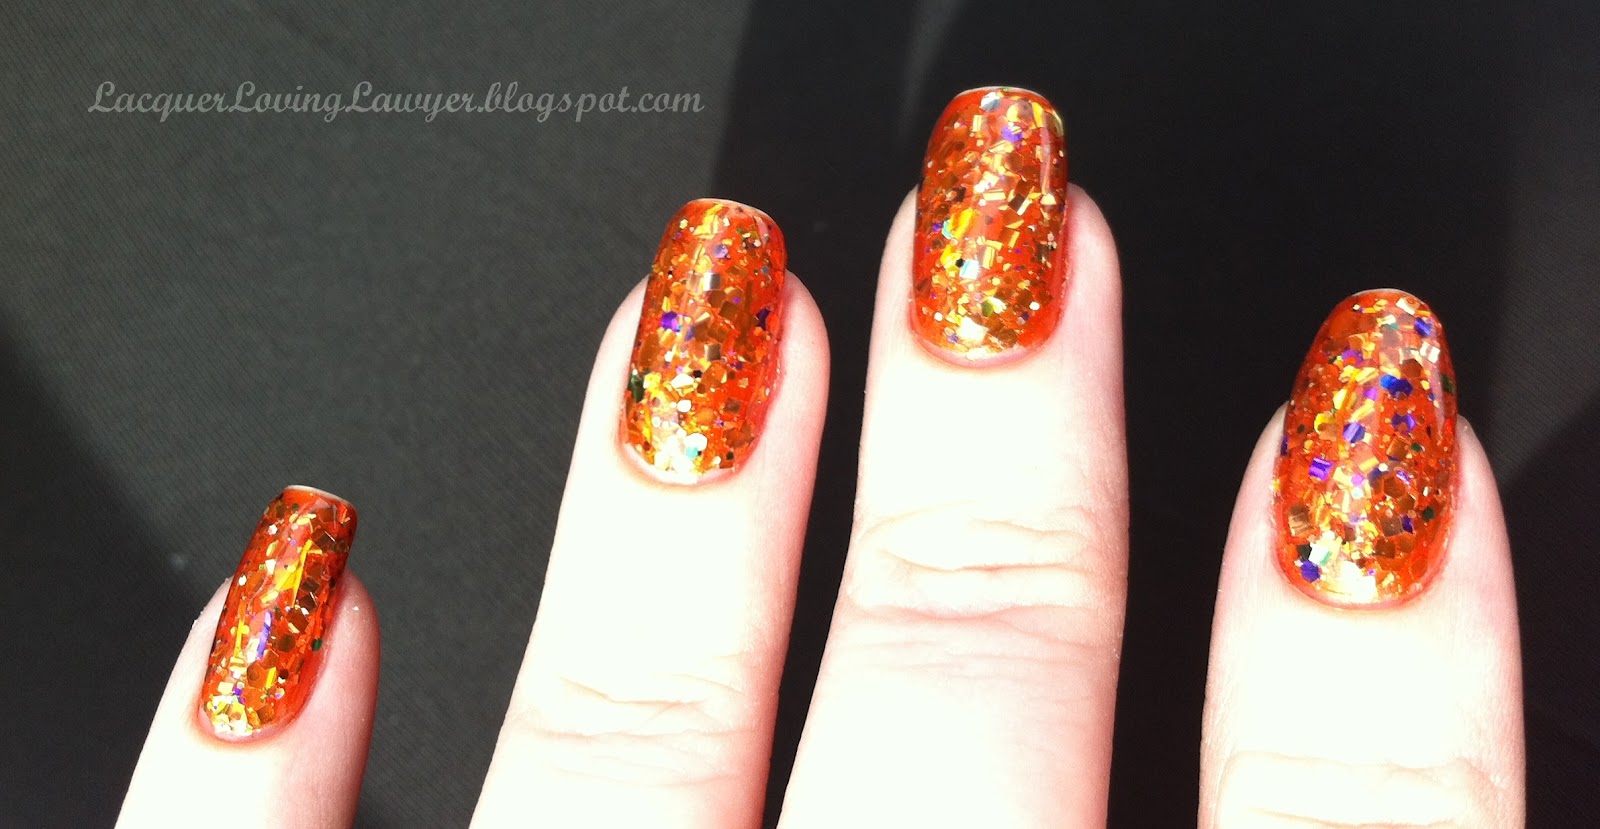
This top coat was very easy to apply.  At just one coat, it looked like fiery red sparks.  At two coats, the full multichromatic red-orange, gold, and green colors showed up.  It made me really happy to look at it . . . again and again.  It dried quickly, and the second coat didn't mess the first one up, even though for the first time, I didn't wait in between coats like I usually do with manicures.  The polish has a good brush, thin and round.  And, basically there was no cleanup needed.  It wasn't shiny enough for me, though, so I added Seche Vite.

This top coat is one of many dupes for Clarins 230 a/k/a "Unicorn Pee."  I don't have the Clarins, so I can't compare them, but I'm very, very happy with my "dupe."  I only spend crazy amounts of money on polish when there are no dupes out there, like with OPI Black Spotted.  I just paid $39 (plus $2 shipping) for that on eBay.

Here are lots and lots and lots of pictures, because I took many more than I usually do and even narrowing the choices a lot still left a lot of photos:


Indoors

Indoors

Sunlight

Sunlight
It can get really green at some angles!

Sunlight

Sunlight

Sunlight

Indirect Sunlight

Sunlight

Sunlight

Indoors
It looks like it has little embers in this picture.

Indoors

Indoors, office lighting.

Indoors, flash.
Blurry, but looked neat.

Indoors, office lighting.


Thank you for reading my blog!

Sunday, September 9, 2012

China Glaze Stone Cold

Thank you so much for your patience while I was sick and then while I completed a very long continuing legal education course in my "free" time.  I should be back to blogging more now, and I will start exercising and keeping a food log again on Tuesday.  I explained why Tuesday on the blog's Facebook page.  If anyone uses the iPhone's Lose It! app or uses Lose It! online, please send me a private message if you would be my Lose It! buddy.

At the end of September, I will have been blogging for six months.  I am planning a giveaway, and I will probably have some indie minis as the prize.  If I reach 50 fans on Facebook (I'm at 48), I will start the giveaway then rather than at the end of September.  I was also keeping an eye on my number of published posts to start the giveaway if I reached 100 published posts before the end of September, but I'm at 80 published posts--this one will be #81--so the Facebook fans will probably reach 50 before I can reach 100 published posts.  Finally, I'm watching my number of followers through GFC (Google Friend Connect), and if those were to reach 75 before the end of the month, I will start the giveaway then; I'm at 67 GFC followers.  At the latest, though, the giveaway will start at the end of September, for my blogging demi-versary.  Yay!

On to the polish review:

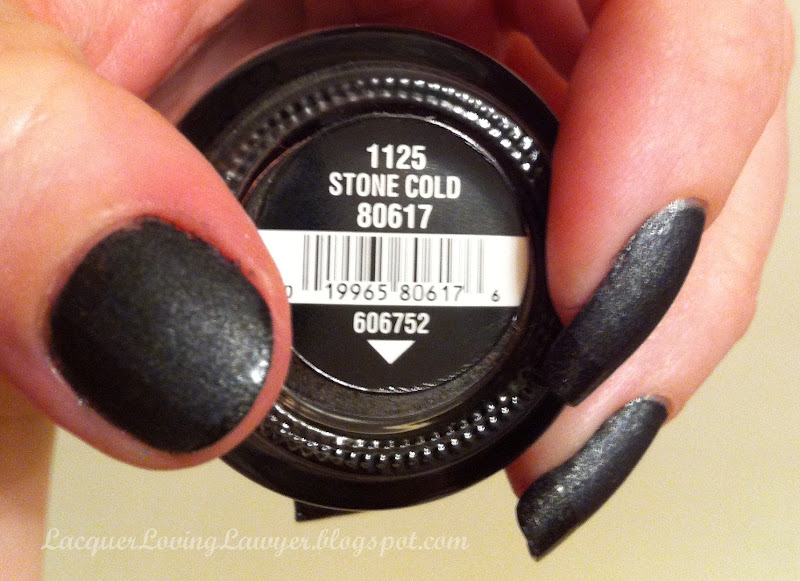
I am pretty sure that this was the first time I had ever worn black nail polish.  I would not have thought I would like black polish, and I had no idea how much I would love China Glaze Stone Cold.  When I first swatched it on a nail wheel after I bought it recently on clearance, I was surprised to see it dried matte!  I thought I had bought the other dark Hunger Games collection polish that did not dry matte.  I was very excited about having the matte polish, though.  I like it so much!

It's an amazing formula, opaque in one coat!  It dried quickly.

Cleanup took a while, but it was easier than cleanup of black creme polish.  Using acetone for the cleanup around the edges of my nails took a bit of the black off on the edges, revealing silver underneath.

I was very worried it would not last without top coat, though.  I did do a "funky French" with top coat free-handed on the tips, and I even tried to wrap my tips (maybe for the second time ever, I just can't seem to do it without ruining the manicure with clumps over the edge), but I worried the matte parts of the manicure would chip.  It wasn't long before my OCD self insisted on topcoat somehow.  I wore the funky French for a couple of days, though.  And, for those two days, each morning I touched up the tips with a new layer of top coat.

Here are some pictures:

Sunlight.


Indoors, office lighting.


Indoors, flash.


Indoors.


Indoors, flash.


Indoors.
My poor little thumb nubbin has completely grown out now!  It's been a month since I took these pictures.


Thank you for reading my blog!


Sunday, July 22, 2012

China Glaze Magnetix Attraction

China Glaze is one of my favorite polish brands, and I like their magnetic polishes.  I have reviewed their blue magnetic polish, Pull Me Close, here.  I have also worn their magnetic polish in a gold/brown shade, but that was before I started taking pictures of my nails and blogging about them.  I have also reviewed some Nabi magnetic polishes, most recently their red and black polish called "Wine" here and earlier their gold and brown polish called "Dark Gold" here.  I think I like the formula on the China Glaze polishes more, but the color selection (60 different colors of magnetic polish, all in very vibrant colors) of Nabi is amazing, and they cost me less than the China Glaze magnetics.  Also, the Nabi polishes have their magnet built in, whereas with China Glaze you had to buy the magnet separately (and store it--storage is always something I think about).  But, the China Glaze magnets are stronger than the Nabi magnets.  And, the China Glaze doesn't have the strong smell that the Nabi polishes have.  I don't even notice the Nabi polish smell anymore.  I use Seche Vite as a top coat, and it has a stronger smell to me than the Nabi polishes.  But, there are people who are very sensitive to strong smells in nail polish.

I started trying to make the star pattern with the China Glaze magnet, but it is hard to get the star centered on your nail the very first time.  Eventually I had gloopy multiple layers of polish on the first few nails I did.  Inevitably, I smudged the polish on a nail on my right hand as I moved on to start painting my left hand.  When I went to use a brush instead of an orange stick with cotton to try to remove the polish on that nail without getting cotton fibers all over, the brush fell into the bottle of acetone.  It was a brand new 16 oz. bottle of acetone.  The brush was an E.L.F. concealer brush with the white paint on the handle.  I couldn't get the brush out quickly, so I had to move to the kitchen, pour out the acetone (now with white paint in it) into a glass, get the brush out (now with a rough and unpainted handle), and pour the acetone back into the bottle.  It was a brand new bottle, so I didn't have a backup bottle, so I had to use the paint-filled acetone later for cleanup.  I was *not* in a good mood.  And, I had been, as usual, trying to rush through the manicure because it's always the last thing I do on Sundays before dinner, and I always seem to take much longer than I expect.  So, there I was rushing, and now I had to start over on my right hand.  So, I switched to the diagonal stripe magnet pattern.  It is much more forgiving and takes much less time.  If you are too high or low on your nail, it doesn't make a difference.  You still get diagonal stripes all over your nail.  If you are too much to the right or to the left on the nail with the magnet, again, it makes no difference because the pattern doesn't have a center like the star magnet does.

I like the China Glaze brush.  It's thin like the Revlon brushes.  Those are the brushes I first used decades ago to polish my nails, so I'm attached to them and used to them.  Now I am slowly learning to like the slightly flat and slightly wider brushes, like the ones in the Hits polishes.  The polish was easy to apply and dried quickly but not so quickly that I couldn't go over strokes if needed.  I used two coats of the magnetic polish over a base coat.  Then I used a coat of Seche Vite top coat, and throughout the week on some days I added a coat of Revlon's Quick Dry Top Coat.  The wear was the same as with my other magnetics.  They last a week on me just like my other manicures, but they do start to wear away around the edges faster than non-magnetic polishes.  They didn't chip at all, though.

I really liked the look of Pull Me Close with hematite bracelets and dark bracelets with a gritty finish that I have.  My secretary even noticed the manicure!  The polish is a beautiful dark gray, and parts of it are like metallic silver or metallic charcoal but with a gritty and grainy look that is really pretty.

Here are some pictures:

In Sunlight

Sunlight

Sunlight

This is blurry, as the camera seemed to focus on my skirt rather than my nails,
but you can see the sparkle in the polish and how it reflects a rainbow of colors.

Indoors, office lighting.

Indoors, office lighting.

Indoors, using flash.  Look at that beautiful metallic-like shimmer!

This was after a few days of wear.  I was trying to get a picture of the polish in sunlight, and the sun came out for a moment while I was walking my dogs.  We have had several weeks of bad weather in South Florida and not much sunlight.  Normally I crop the photo to just show my nails, but in the upper right-hand corner of the picture you can see my little girl doggie out of focus.  Aw!

After a week of wear.


Thank you for reading my blog!


Sunday, June 10, 2012

Lynnderella Cauldron Drippings and Star Trinkets Jewelry and China Glaze Cross Iron

I received my nail polish jewelry from Star Trinkets about 10 days ago and have been dying to blog about it, but I've been very busy at work this week, and I had a bunch of doctors' appointments, too (not for illness, just regular follow-ups and check-ups) and errands and chores, and I also spent some time with family, so I have not had time until now to blog about the gorgeous jewelry Susan made for me.  She made a set of earrings and a bracelet for me using Lynnderella Cauldron Drippings.

Here are some pictures of the package from Susan:


The black bag was such a pretty touch!  And, everything was securely bubble-wrapped.


I had to adjust the earring loops to make them longer because my ear piercings are set in far from the edge of my ears.  I also adjusted the length of the bracelet.  Sometimes you just can't know how you're going to want to wear a bracelet until you have it on.  I took out about ten or eleven of the extension links.  It was easy enough to do just using a pen at my desk to pry open links.  A few days later, I started wearing the bracelet with the clasp on the end of the actual larger bracelet links with the smaller extension links hanging down from the clasp.  I liked it that way because then it didn't move much and stayed nicely centered on my forearm a few inches above my wrist.  Originally I had ordered a toggle clasp because it's manicure-friendly.  But, Susan had to substitute a lobster clasp instead. I am so glad!  With the lobster clasp, I was able to try out different lengths on the bracelet easily just by changing where I hooked up the clasp.

I took some of the pictures below as I did my manicure, so some of the pictures don't have any clean-up yet.

It took me a long time to choose a polish to use underneath Cauldron Drippings.  I finally settled on China Glaze Cross Iron.  The color, with its brilliance and glow, is gorgeous.  It's an orange that looks metallic.  It did not dry quickly, though.  I messed up a few nails on my first try and had to redo them.

I used a coat of Sally Hansen Age Correct Growth, one coat of China Glaze Cross Iron on my left hand, and two coats of China Glaze Cross Iron on my right hand (that's the hand I start with, but I thought it looked too dark, so I didn't do a second coat on my left hand), two coats of Lynnderella Cauldron drippings, one coat of Gelous, and one coat of Seche Vite, and it dried smooth and glassy.  The next morning I added another coat of Seche Vite.  The next four mornings I added a coat of Revlon Quick Dry Top Coat.  I had some shrinkage from the Seche Vite but none from the Revlon.  Usually it's the other way around for me.

The colorful manicure made me think of Mardi Gras.  With the Seche Vite, the manicure was much shinier than the jewelry and therefore difficult to photograph.

I wore the jewelry on Monday to work with an orange suit, I wore it Tuesday with an orange top, I wore it Thursday with a blue top, and I wore it Friday and yesterday with blue tops.  I got complimented on the manicure yesterday by a woman at the post office, and I showed her the matching jewelry!

I have been wearing this polish for a week, and I have no chips, just tip wear.  I will be taking the polish off later today.  Wish me luck!  This will be my first time removing this much chunky glitter.  If I can't get it off with just a cotton ball and acetone, I will try the foil method.

Here are some pictures of the manicure and jewelry:

One coat of China Glaze Cross Iron
(manicure in progress, no cleanup)

One coat of China Glaze Cross Iron compared to the color of Cauldron Drippings

One coat of China Glaze Cross Iron and one coat of Cauldron Drippings

One coat of China Glaze Cross Iron and two coats of Cauldron Drippings

The finished manicure a day later.
I had forgotten to take a bottle shot of China Glaze Cross Iron the day before.
In the sun, day after manicure.

In indirect sunlight, day after manicure.

Sunlight

Office lighting

Office lighting

Office lighting

Office lighting

Office lighting.  You can see a bit of my orange top,  part of a three-piece pants suit.

Sunlight, day three of manicure

Sunlight, day three of manicure

Sunlight, day three of manicure

This was the ring finger of my *right* hand.  I don't usually photograph that hand.  I love the glitter piece near the bottom with two other little glitters on it; it looks like a button to me.


Thumb of my left hand, trying to get an angle shot so you could see the dimension of the layers of glitter.


Thank you for reading my blog!